Make Photoshop Work for You
Best Photoshop Cool Tips
The Menu Bar Part 1
Let’s face it. The Adobe® Photoshop® learning curve is steeper than the eye can see.
To start on the sharp upward climb, learning how Photoshop ‘thinks’ can be very helpful. If you gain some better understanding of how Photoshop features are laid out, it makes it so much easier to find things, even if you don’t know exactly where they are, or, what they might be called.
I’m here to lend you a hand up with a series of posts on How To Make Photoshop Work for You. These posts will be classified as ‘Best Photoshop Cool Tips‘ and individually identified by topic
Any huge mental meal is easier to digest if broken down into smaller bites. We will nibble at the most useful, if not tastiest, morsels first.
I have found that experienced colleagues of mine, as well as students just beginning their ascent, benefit from getting some better insight into the Photoshop approach to its Menu Bar.
(Menu Bar. It sounds like I should be ready to order before the waiter returns, doesn’t it?)
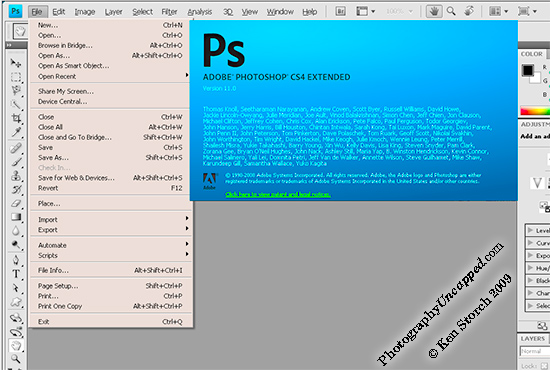
The Menu Bar is the line of ‘commands’ across the top of the Photoshop application’s window. For the sake of present day accuracy, I’ll use the current version of Adobe Photoshop CS4 Extended as our example.
(Not to worry… If you have an older version, or are using Elements, you might find a few options in different places, or not available with your version. These differences will not affect the major features I’m presenting)
We’ll begin here with the way Photoshop looks when just starting out.The ‘Default Workspace’ has lots to offer and confuse you with. Sticking to the basics makes it much more controllable. To this end, I am going to skip over things that you likely won’t be needing initially, but can get to learn later (or much later ;> )
I’ll discuss the main areas of interest to beginners, and to people hoping to learn a few more Photoshop tips.
The most useful (to you right now) Menu Bar ‘categories’ are:
- File
- Edit
- Image
- Layer
- Select
- Filter
- View
- Window
- Help
![]()
(Yes, I’m skipping a few advanced areas for this set of Photoshop tips)
Here is as brief a summary of what you will find under each of these ‘categories’ as I can manage as an intro. Each command also has sub-commands which I’ll only barely even mention here, if at all (can you smell future posts?) Click on one of these ‘categories’ and a Drop DownMenu will appear.
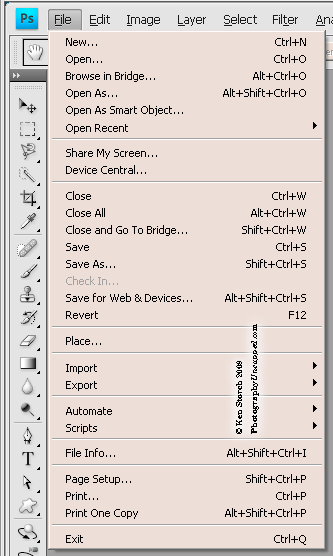
- File This is where you do the basic file functions as you would with any computer files: You can Open a file from your computer hard drive, camera, or flash drive, create a New file, Save files, Close files, Save for Web & Devices (for emailing or posting smaller picture to the web), Print files and Exit Photoshop entirely.

- Edit is where you have the mighty Undo which ‘un-does’ the last thing you did (you’ll learn to LOVE it!) Copy and Paste things, Transform their shape, and, for advanced users, edit most of Photoshop’s Preferences, and Color Settings.

- Image changes many things which permanently affect the entire picture image file, such as the Mode (mostly for advanced users changing the Bit Depth), Adjustments (which can usually be best performed with Layers, see my Tips on Photoshop Layers), and importantly, Image Size where you change how big it will physically appear on the web or in a print, Canvas Size which modifies the file’s dimensions in the purely digital realm, Crop, Image Rotation, and Duplicate where you can make an exact copy of the file as it is, to work on the copy without messing up the original (an excellent habit which I plan to cover in another blog on good working practices.)

I’m going to break this post into Part 2 where you find the all important Photoshop Layer section, Filter area, and, you’ll want this – the HELP! menu items.
Make Photoshop Work for You – Best Photoshop Cool Tips – The Menu Bar – Part 2
My screenshots of Adobe® Photoshop® are for illustration purposes only.
Good post. PS makes some sense now
Thanks for your feedback.
Ken Storch
wow, thank you!! Navigating through PS has been a steep learning curve for me, but these tips help. Thanks for being my “at home” PS instructor!!!!!!!!!!!!!
Hey leela,
glad to be of some little help.
you know what they (yeah who’s they?) say…..
home is where the heart is
or is it?
I’m not sure wny adobe put some things where they are, but this helps some. like why is cut and paste with the color settings?
Can’t tell you why, sometimes, only where.
ken
I’m currently running PhotoShop Elements 8/Trial version. I’ve still got PhotoShop version 3.0 in the background. So I’m not totally new to this.
But, When Adobe released this version, they should’ve made the Menu Bar at the top of the display more visible. Instead, they
have it with a dark grey background and black text. It IS very
hard to see which commande you’re clicking.
Other than that, it is a nice program.
Gary Stanullwich
Hi Gary,
I don’t have Elements, but perhaps there is a setting for this under Preferences? Maybe under ‘interface’ ?
Also, possibly your display is representing that Menu background shade of gray exceptionally dark?
Oh, and PS 3 is when I started working with PS!
Cheers,
Ken