Here is Part 2 of:
Make Photoshop Work for You – Best Photoshop Cool Tips – The Menu Bar
- Layer is the powerful area of Photoshop which allows you to affect different things about your image separately form the other parts. How this is done will take at least one more lengthy post of it’s own (stay tuned for that really helpful addition to this site). Here you can create the types of layers used for different purposes, as a New layer and Duplicate them, change the Layer Properties, Mask them to hide parts, and move them around with Arrange and Merge.

- Select gives you options for changing small areas in very specific ways. (I am working on a detailed explanation of what Selections are, and how they can be used). You can select All of the image or Deselect something, Inverse (to switch from a selected area to what wasn’t selected), select any Color Range of the image, and ways to Refine (the) Edge and otherwise Modify the selection.

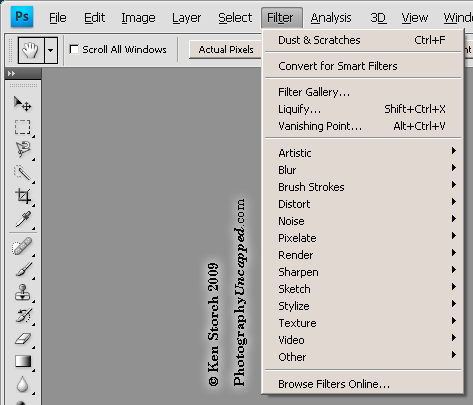
- Filter often gets overused by beginners seeking Artistic effects, but many useful image corrections are also in here. Blur softens (as you might expect, but has other uses also), Distort and actually help ‘un-distort’ an image with Lens Correction, Noise can, obviously Add Noise, but Photoshop oddly uses this area to Reduce Noise, Despeckle little specks, and eliminate Dust & Scratches. The best one yet is Sharpen, especially Smart Sharpen which can help (but not completely correct) Lens Blur, Motion Blur, and general blurring referred to as Gaussian Blur. If you’ve installed any Filters made by other persons or companies, they’ll also appear in this menu.

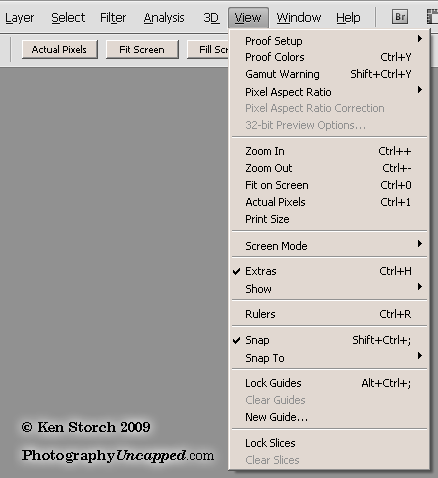
- View is for changing how the image’s document window appears (not to be confused, alas, with the next Menu item called, amazingly confusingly: ‘Window’) View offers Zoom In, Zoom Out, Fit on Screen (which makes the image just ‘fit’ in the space on your monitor), and Actual Pixels makes for a 100% view (important for critical editing). Additionally you can make Extras such as (only visilbe on the computer monitor – not on a print for example) Guides a Grid (adjustable strangely, back under Edit>Preferences) and the often helpful Ruler.

- Window is for choosing which of the many Palettes are visible at a given time, and how you arrange them for your style of working. I hide some palettes for some kinds of work and save the way I’ve customized the Photoshop layout under Workspace>Save Workspace. Also handy, down at the bottom of Window is where you can see of all the files you might have Open at one time (if only 1 file is open, that’s all you’ll see listed here), which one is the active one (it has a little check next to it) and you can bring another to the front by selecting it.

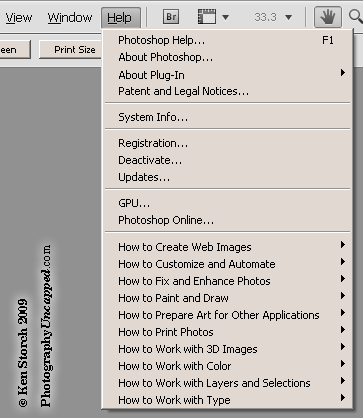
- Help is last, and to some poeple, least. This is where you access the online (web connection required) Help files (an area of contention for some users) as well as some Help files within your Photoshop installation. This is where the anti-theft Registration and Deactivate (for legally moving your copy to another computer) reside.

Okay. Phew! What a lot of options. And I left things out, on purpose. Learning Photoshop can cause brain-panic and stupefication (sic) drooling fits. Wow. DON”T PANIC!!!
Basically, Adobe® Photoshop® puts related things together. It may not always seem logical at first look, but eventually this ‘order’ will make more sense to you, and help you find things without really knowing where they are otherwise.
- File is stuff you do with files; Open, Close, Save, Print
- Edit is Cut and Paste land
- Image is for Image Size and Crop stuff, Duplicate , and Image Rotation
- Layer is for working with individual Layer edits
- Select is where you do very localized changes
- Filter covers Blur, Distort, Noise, Sharpen and the Artistic Filters lie
- View lets you Zoom In and Zoom Out and show Extras as visual aids
- Window is for making the Photoshop Workspace look the way you want it to
- Help is for, well, Help
Again, take each thing as you learn it. Try looking at it this way:
- Photoshop is powerful, so it can do lots with many variables.
- You only need some of these options
- Learn the basics of the few you will be working with regularly
- Refer to this guide to help remind you where these things are situated, for when you need them.
- Don’t stress over it; it’s only a software program
- After a while, you learn what you need to and forget the rest, like all of us do.
Remember to subscribe to this site (through email or RSS) so you don’t miss any essential and helpful how-to’s and must get tutorials.
Cheers,
Ken Storch
My screenshots of Adobe® Photoshop® are for illustration purposes only.

This is well thought out.
I can’t always follow PS’s logic, but this post helps.
Thanks
Glad it helps, silvio.
Breaking Photoshop into smaller bits and tips helps I think.
Ken Storch
i like the part 2 even better. the summary at the end is a good wrap up.